Set up the project
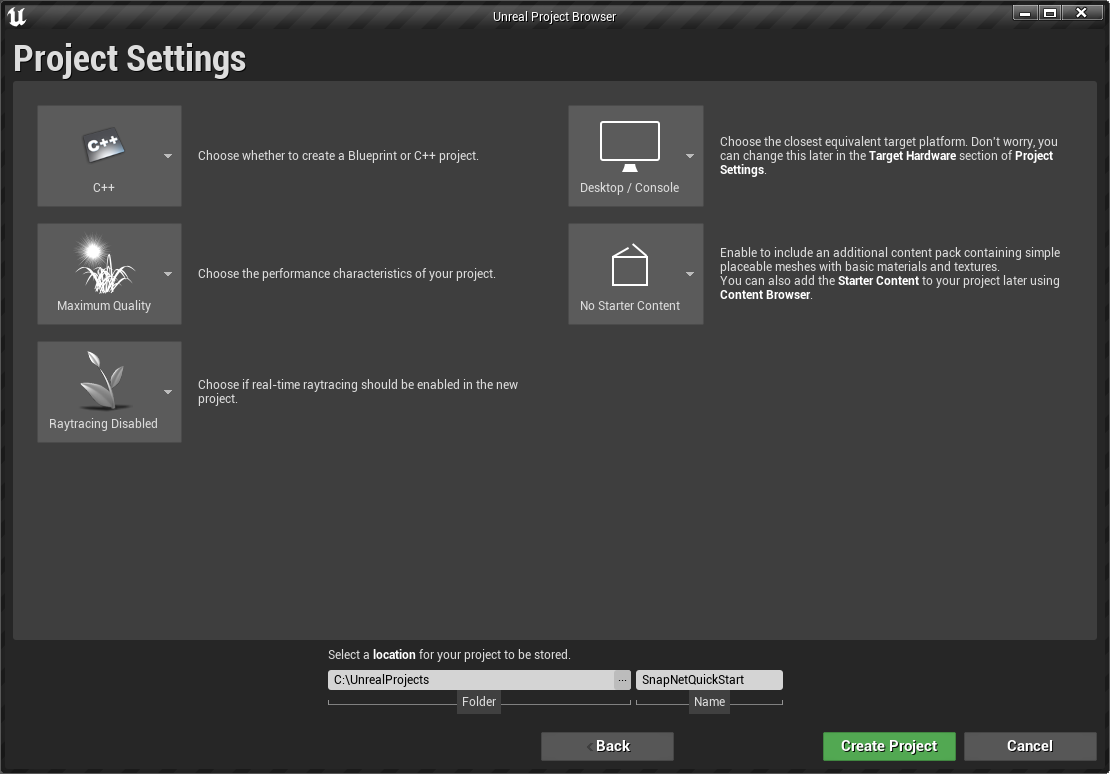
Create a new project
For this quick start, let’s open up Unreal Engine and create a blank C++ game project called SnapNetQuickStart.
Install your license
Copy the license.dat file that was provided with your license into <Game>/Content/SnapNet where <Game> is the folder that contains your game’s .uproject file.
Install the plugin
Place the Plugins folder beside your game’s .uproject file. If you have access to platforms under NDA, put each platform’s Platforms folder beside your game’s .uproject file as well. Once you’ve done so, regenerate project files.
The next step is to add SnapNet as a dependency of your game module so you can use SnapNet from your game code. Open up SnapNetQuickStart.Build.cs and add SnapNet to PublicDependencyModuleNames. Ours looks like this:
|
|
Once you’ve done that, build and open your project in the editor.
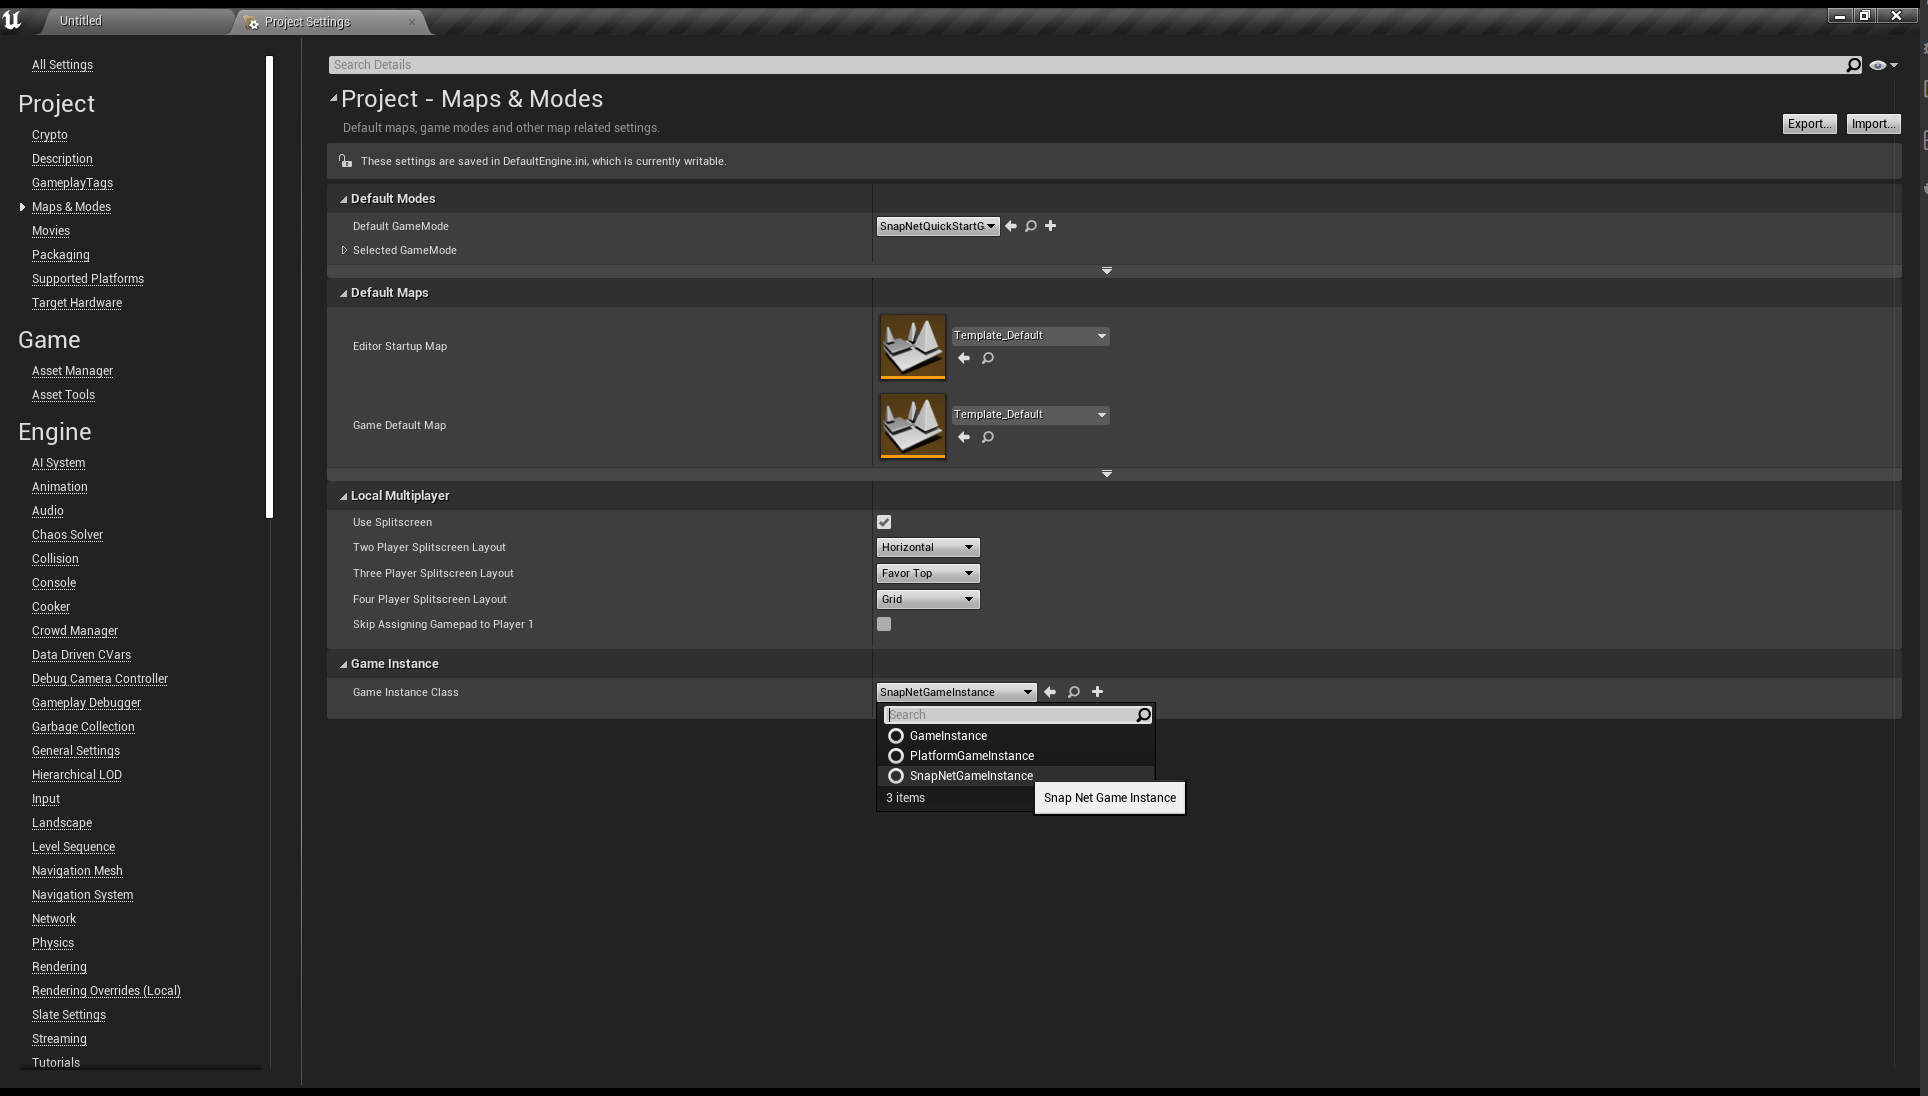
Configure the game instance class
SnapNet comes with its own UGameInstance subclass, named USnapNetGameInstance, that we will use for convenience. In the editor, go to Edit → Project Settings → Project → Maps & Modes and set the Game Instance Class to SnapNetGameInstance.
While using USnapNetGameInstance isn’t strictly necessary, it does a number of recommended things for you automatically:
-
Registers the entity classes, event classes, maps, and reliable message classes specified in Edit → Project Settings → Plugins → SnapNet with the SnapNet subsystem.
-
Starts SnapNet servers and/or clients according to your Play in Editor settings when starting a session in the editor, provided that the currently loaded map has a SnapNet Play Info actor in it.
-
Prevents dedicated server builds from listening for connections using Unreal’s built-in networking layer, since SnapNet will handle connections instead.
-
Limits dedicated server builds to update at SnapNet’s configured simulation tick rate for optimal performance.
-
Enables helpful console commands during development for connecting to servers and operating replays.
If you later use your own custom UGameInstance, it’s recommended to derive it from USnapNetGameInstance in order to retain the above functionality.
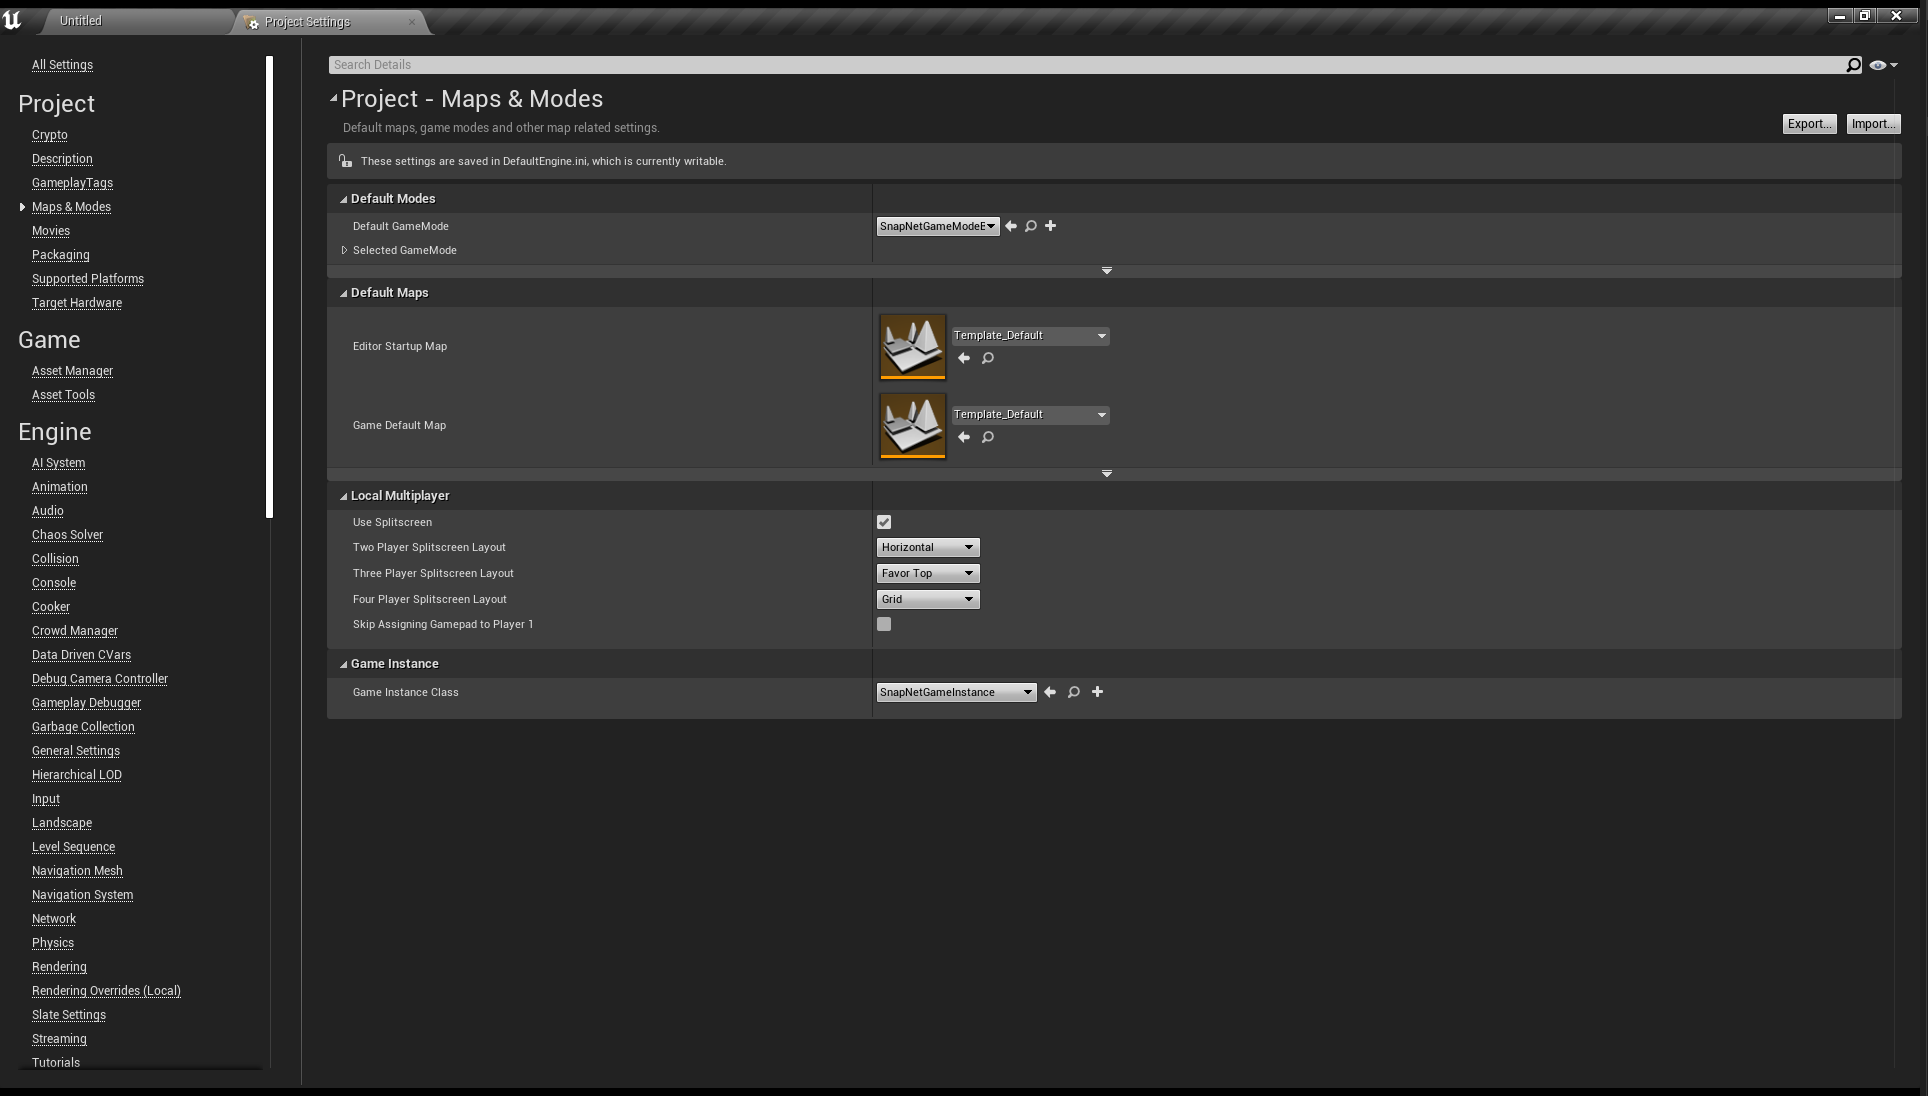
Configure the game mode
While using Unreal’s built-in networking, the game mode actor is responsible for running a lot of your networked server logic. In a SnapNet-powered game, server logic is handled elsewhere, so a lot of the default game mode functionality isn’t needed. Setting the default game mode to ASnapNetGameModeBase, while not strictly required, sets the default pawn class to null for you. Since the USnapNetServerScript should be in charge of spawning actors for the player to control, you don’t want the game mode to spawn a pawn on start.
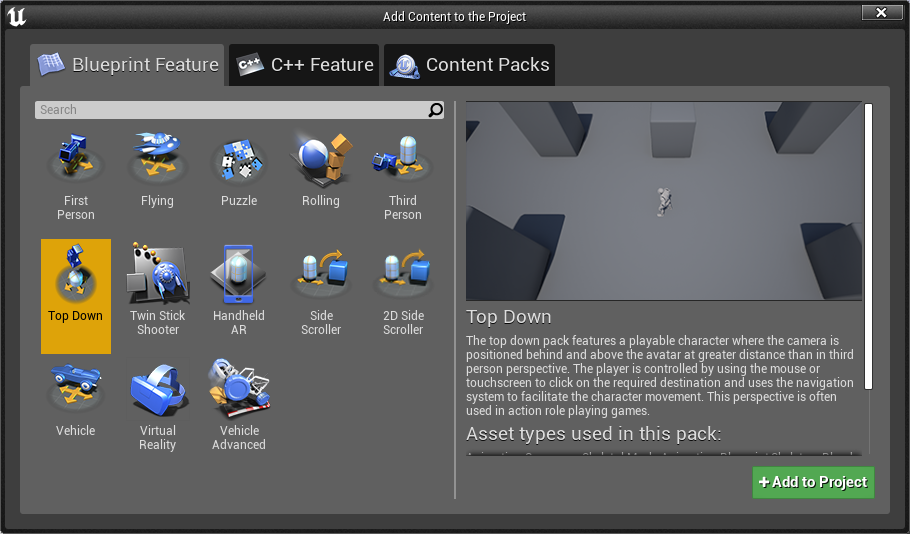
Import the template content
In order to pull in a simple map and mannequin to use for this guide, we’ll import the content from Unreal’s Top Down template. To do so, click Add/Import in the Content Browser and select Add Feature or Content Pack.

In the newly-opened Add Content to the Project window, select the Top Down blueprint feature and then select Add to Project. This will import a number of assets into the project. You can then close the window.
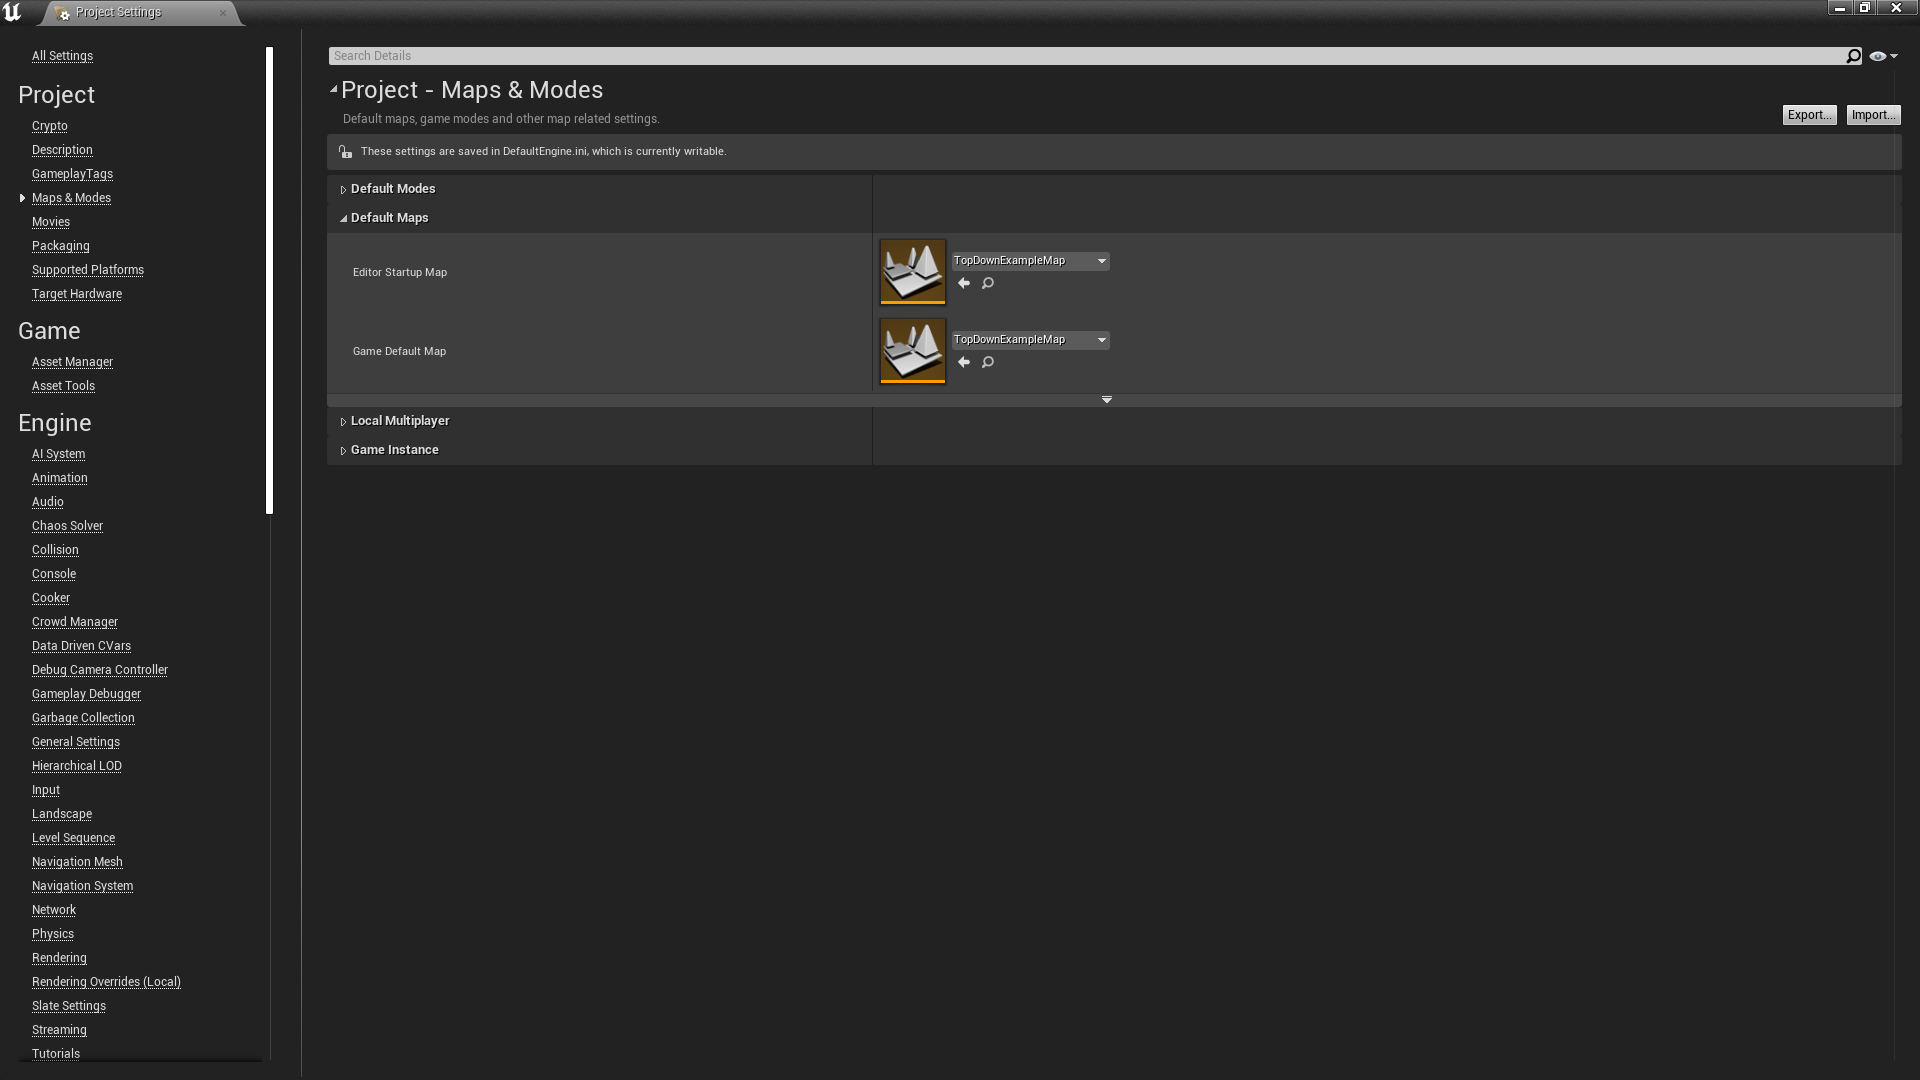
Set the default maps
We want the editor and game to use the TopDownExample map we just imported by default so let’s set that up in the project settings. Navigate to Edit → Project Settings → Project → Maps & Modes → Default Maps and set both the Editor Startup Map and Game Default Map to TopDownExampleMap.
Prepare the map
Now, let’s open up that map. In the Content Browser, navigate to Content → TopDownBP → Maps and double-click on TopDownExampleMap to open it.
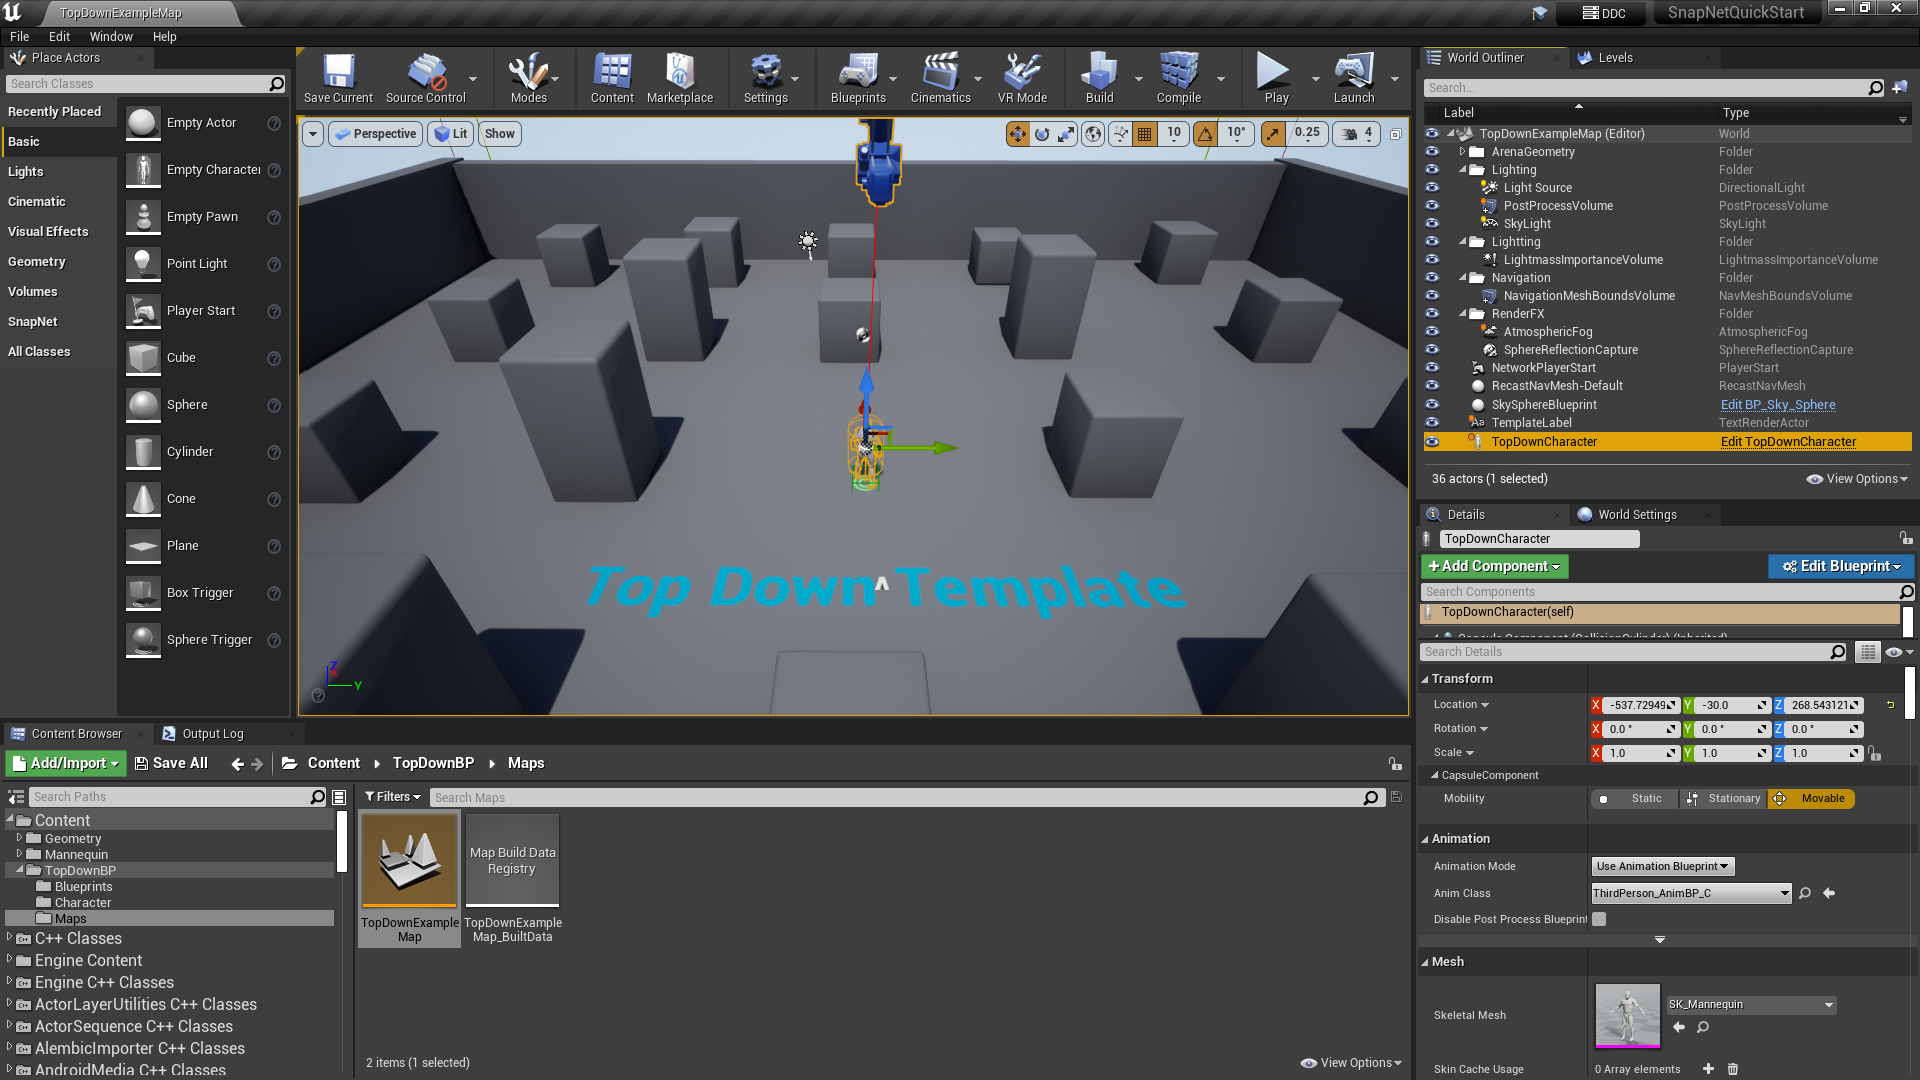
Remove pre-existing functionality
While we’re interested in the map itself and its associated content, we don’t want any of its pre-existing functionality. To remove this, we’ll first delete the pre-placed TopDownCharacter instance in the map by left-clicking to select it in the World Outliner and then pressing the Delete key.
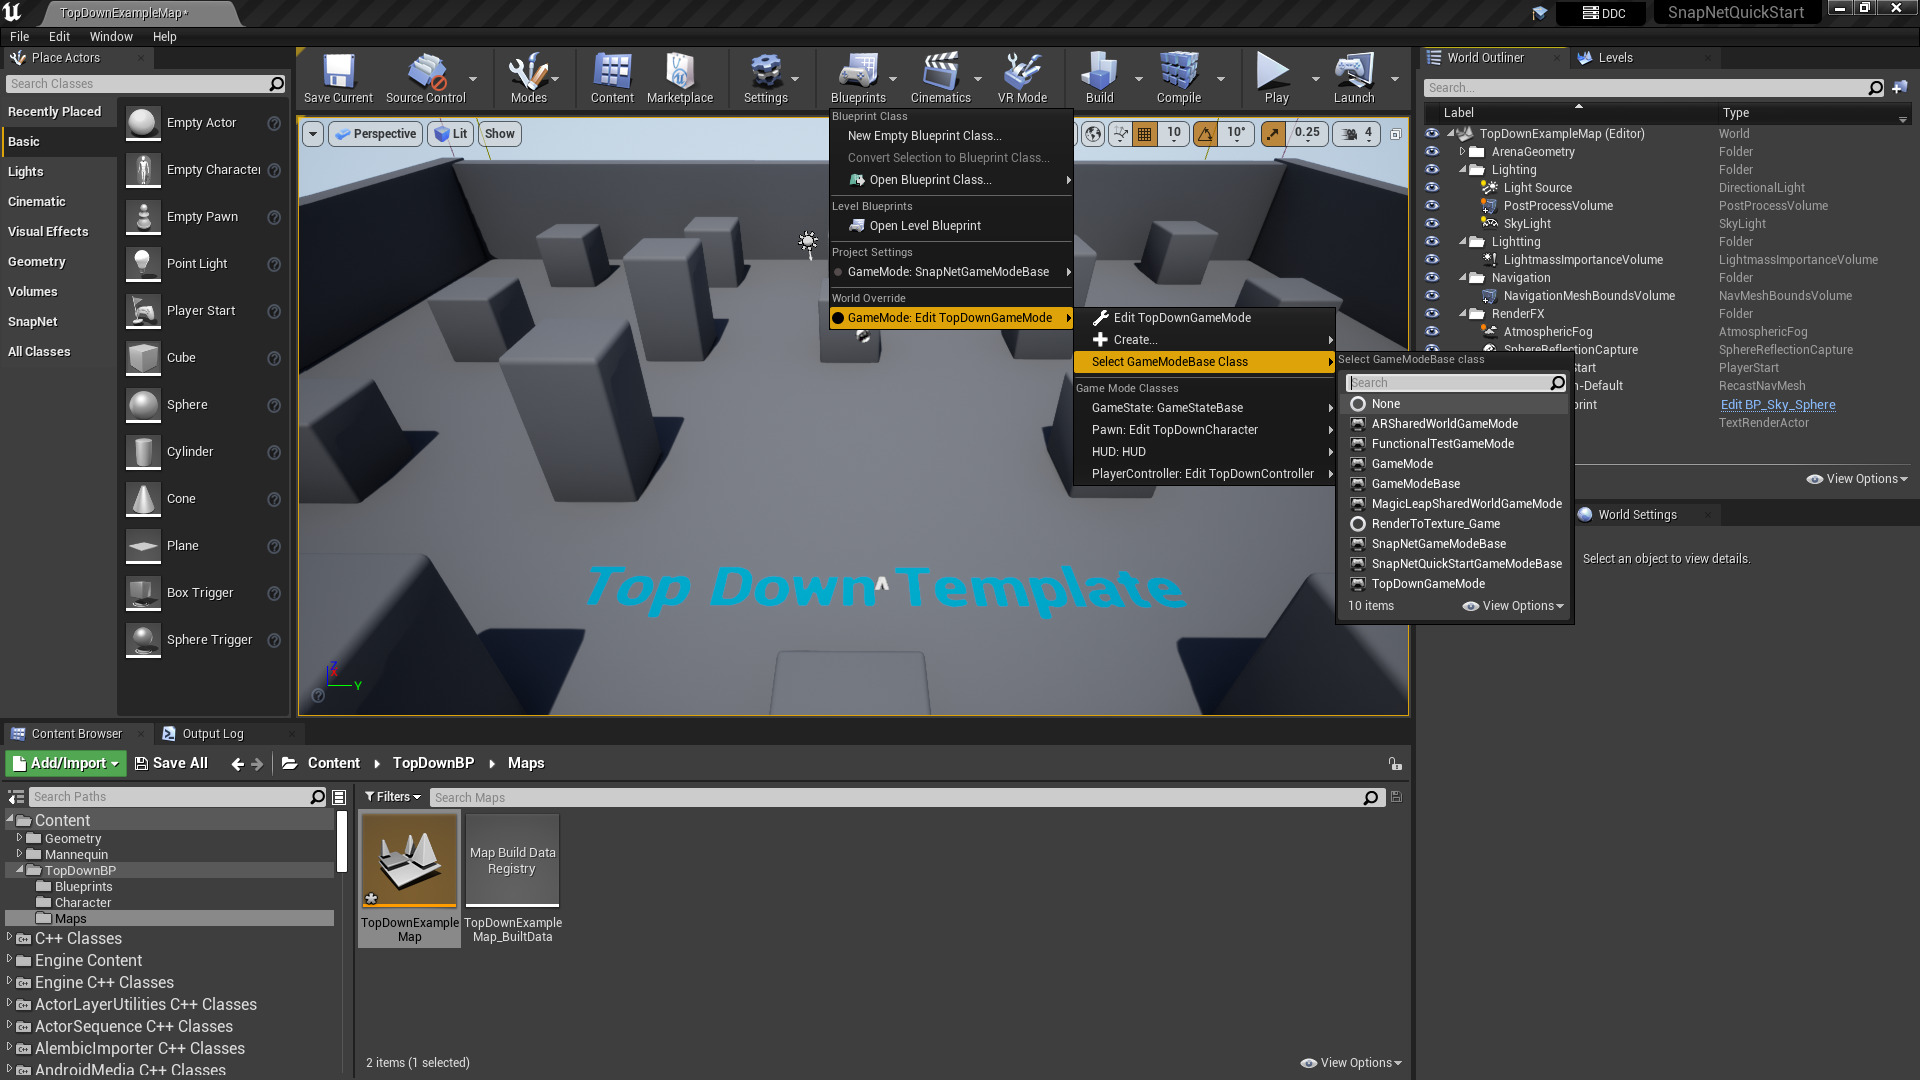
We then need to clear the map’s Game Mode Override so that it doesn’t run the template’s game mode. To do so, click Blueprints → World Override → GameMode → Select GameModeBase Class → None
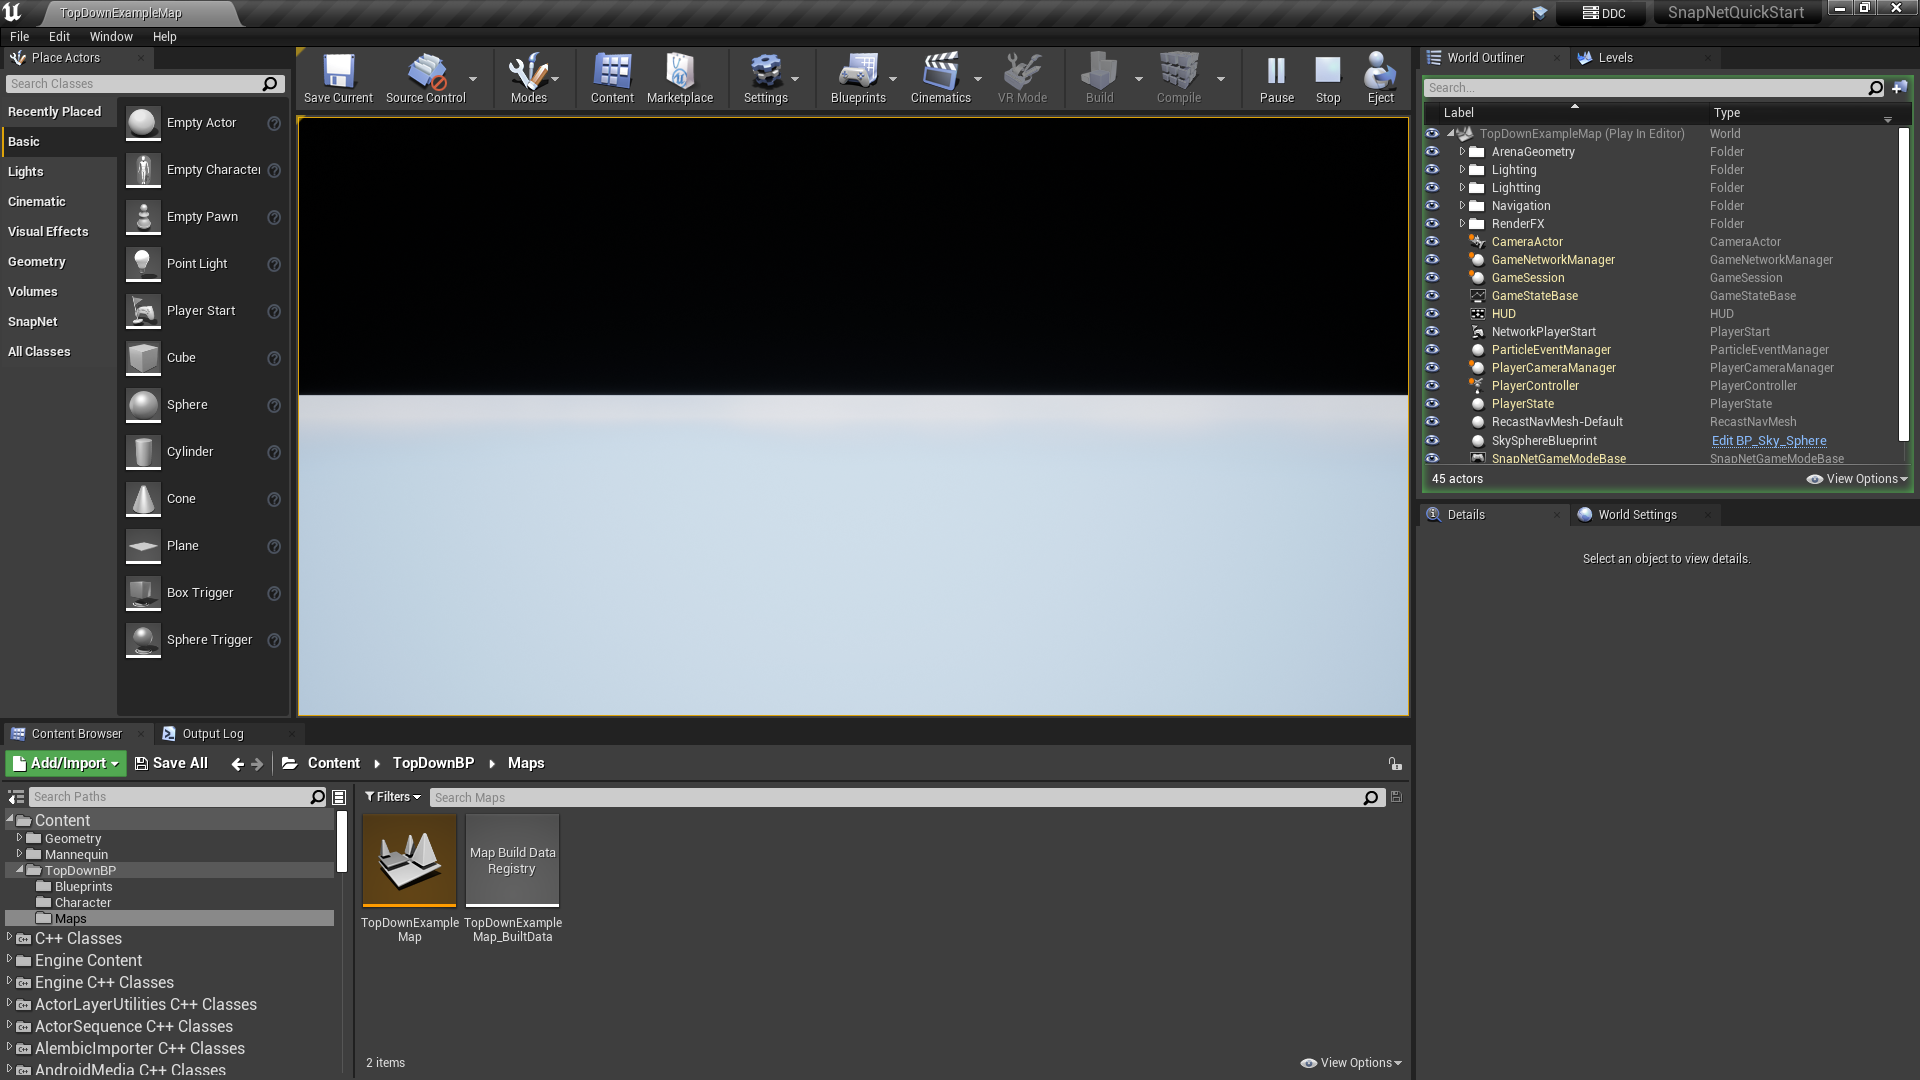
With those changes made, click Save Current in the toolbar to save the map. Now, when you press Play on the toolbar you should see a screenshot like below, with the upper half of the screen dark and the bottom half of the screen filled with the skybox. This is because without any view target like a pawn, the camera defaults to the origin (0,0,0). That’s ok! We’re going to fix that next.
Set up a stationary camera
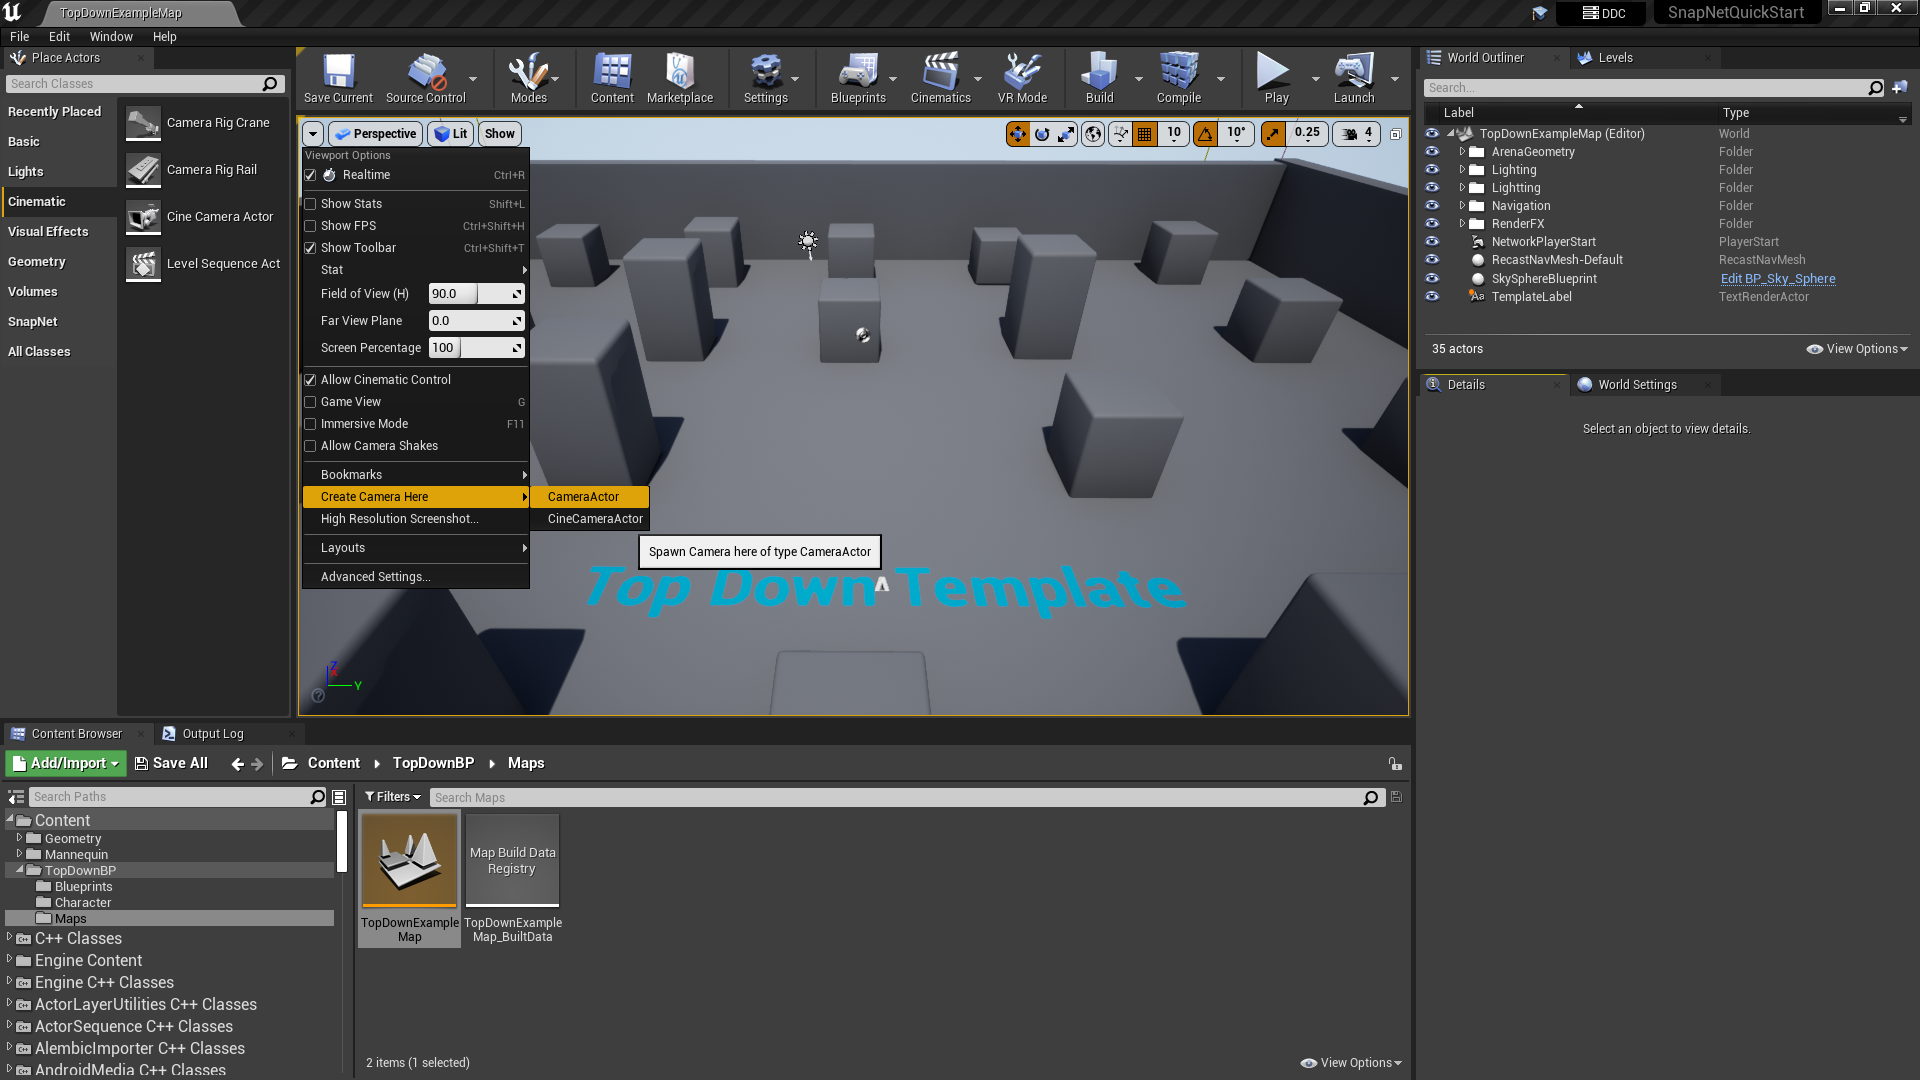
To keep things simple for now, let’s just set up a single stationary camera. In the perspective viewport, fly somewhere that gives you a reasonable view of the map, open up the Viewport Options menu (by clicking the small arrow in the upper-left corner of the viewport) and select Create Camera Here → CameraActor.
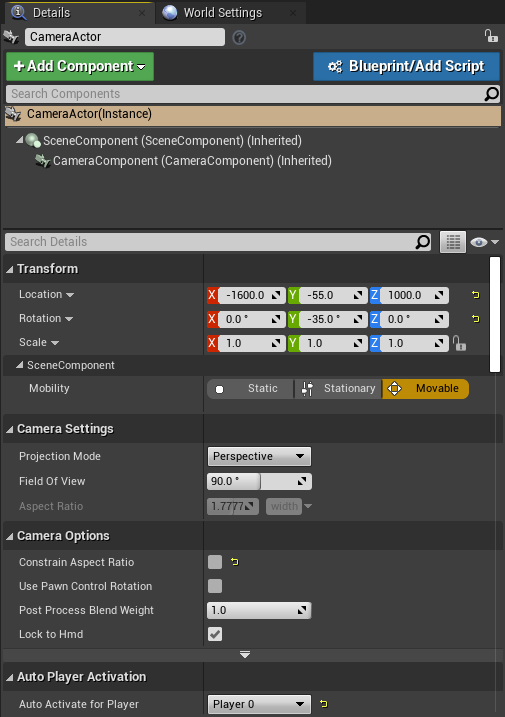
With the new camera selected, go to the Details panel and uncheck Camera Options → Constraint Aspect Ratio to prevent any black bars showing up, and go to Auto Player Activation → Auto Activate for Player and select Player 0.
Click Save Current in the toolbar to save the map. Now, when you press Play on the toolbar, you should see the map from the perspective of your newly placed stationary camera.
Set up player starts
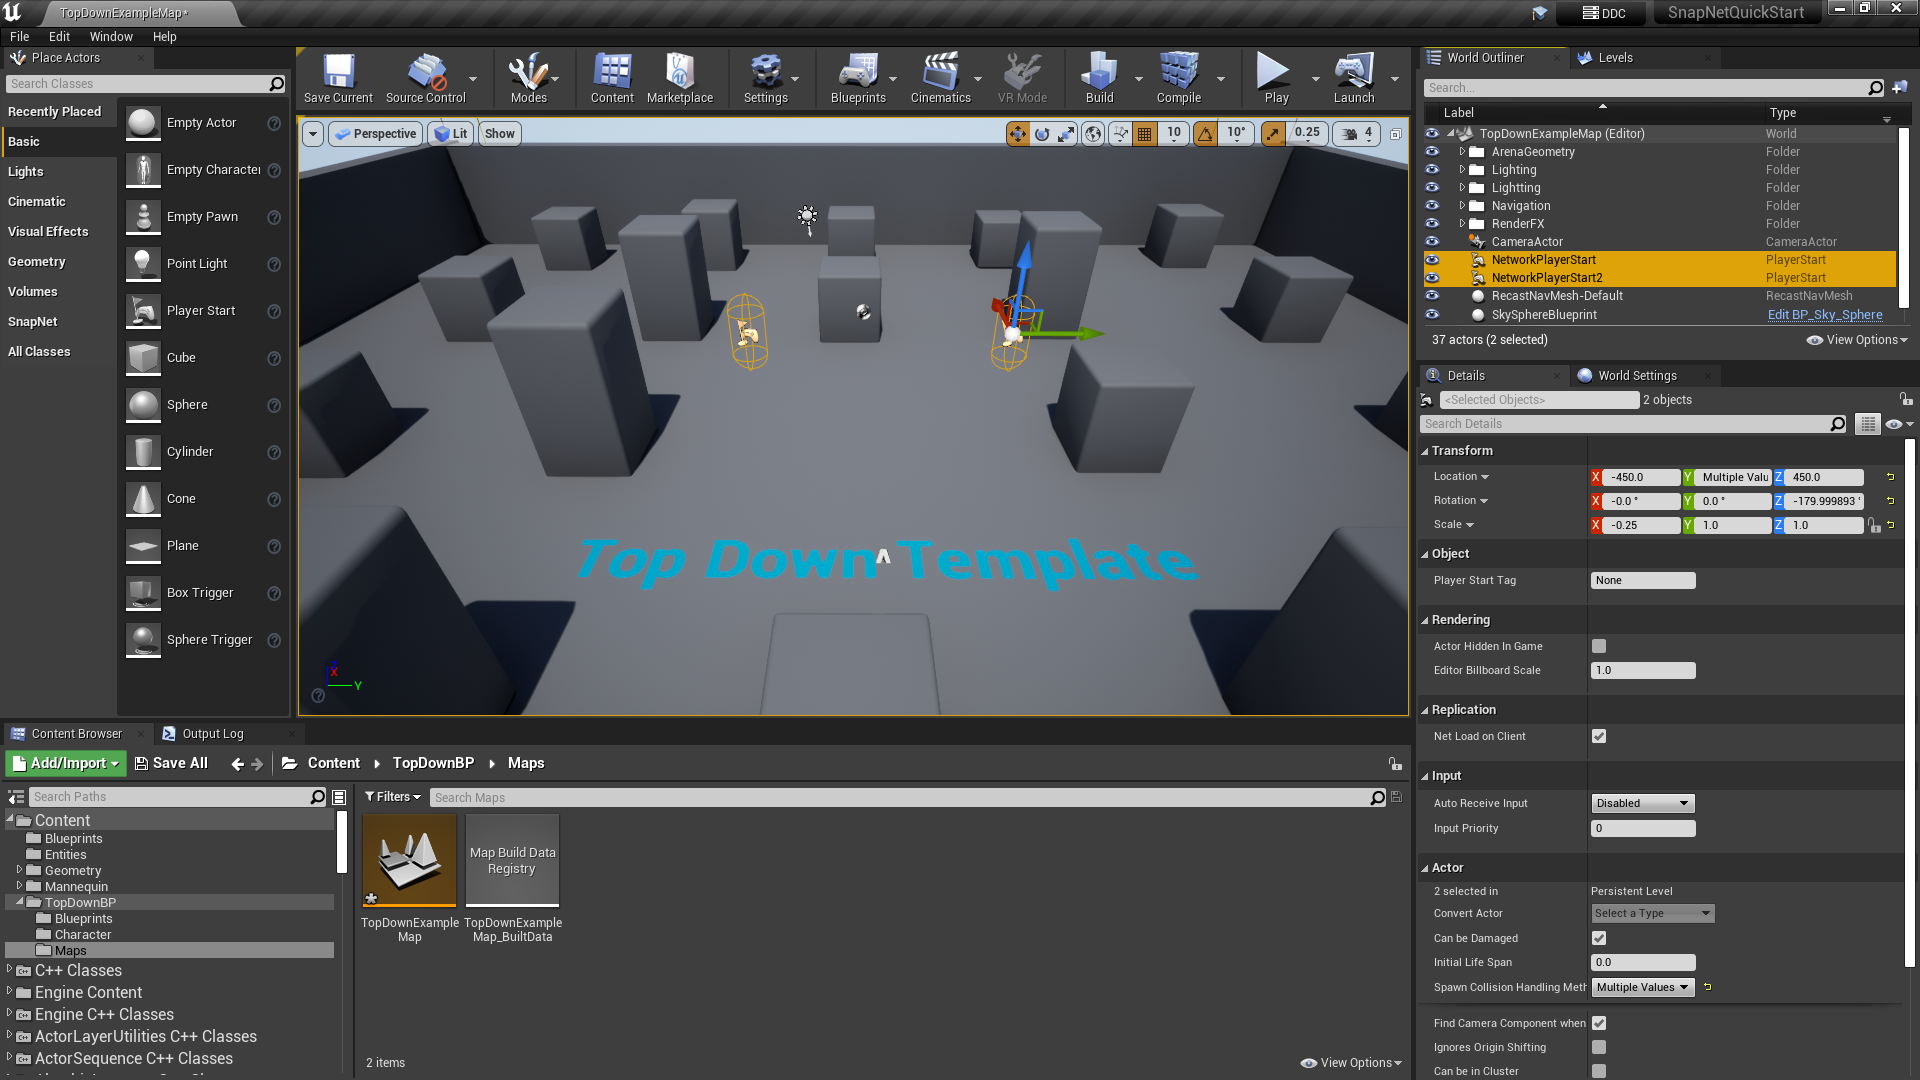
There is a single pre-placed PlayerStart actor already in the map, named NetworkPlayerStart. It’s partially penetrating the ground and is a bit tucked away. Since we want to use PlayerStarts as spawn locations for the player entities, let’s move it to a more central location and then alt+drag it to duplicate it so that we have two. Here, we’ve moved it to (-450, -300, 450) and then duplicated it to create a second one at (-450, 300, 450).
Click Save Current in the toolbar to save the map.
Register the map with SnapNet
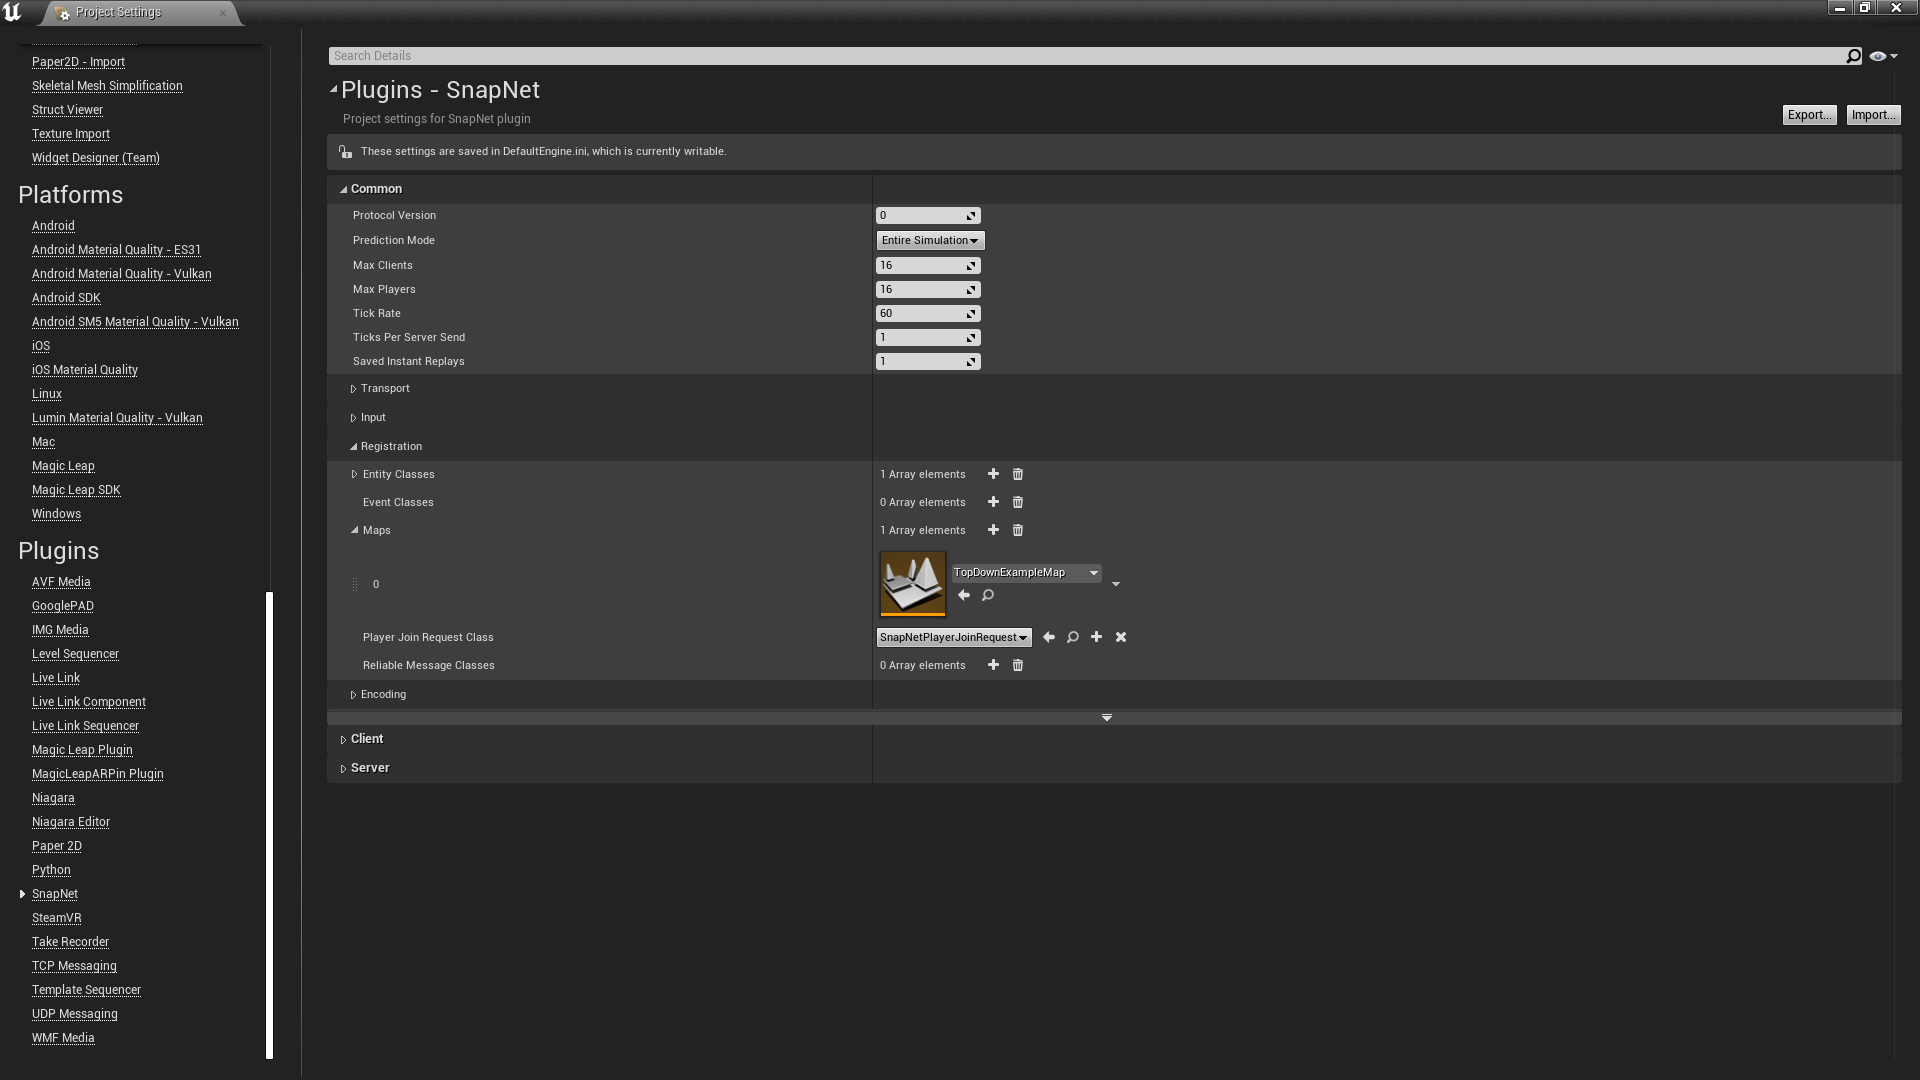
Any map that might be played with SnapNet needs to be registered with the SnapNet Subsystem and the list of registered maps must be identical between clients and servers. The easiest way to do this is to list the map in SnapNet’s project settings. Go to Edit → Project Settings → Plugins → SnapNet → Common → Registration → Maps. Click on the + sign to add a map to the list and then, in the dropdown, select TopDownExampleMap.
Note
For full control over map registration, games can manually register maps using the corresponding member functions on the SnapNet Subsystem.Next Steps
Continue on to create a simple player entity.