Trigger an event
While the core of the networked simulation is powered by entities and their synchronized fields, there are certain situations that don’t fit neatly into that model. For example, consider the act of firing a bullet in a first-person shooter. In order to play the corresponding visual and sound effects, there’s likely a number of fields that you’d like to transmit regarding the firing of that weapon such as what weapon was used, the attacker, the victim (if any), from where it was fired, the impact location, the surface type that was hit, etc. These fields don’t necessarily belong on the attacking actor itself, but are critical to triggering effects associated with the firing of the weapon. This is where SnapNet’s events come in.
In this guide, we’ll extend the quick start to trigger a simple Niagara effect above the player when you click the mouse.
Add Niagara as a dependency
In order to use Niagara from our game module, we need to add it as a dependency in our build script. Open up SnapNetQuickStart.Build.cs and add Niagara to PublicDependencyModuleNames. Ours looks like this:
|
|
Create the event class
First, we’ll create a subclass of USnapNetEvent:
#pragma once

#include "SnapNetEvent.h"
#include "SnapNetPropertyEntityIndex.h"
#include "SnapNetPropertyVector.h"

#include "SimpleEvent.generated.h"

class UNiagaraComponent;
class UNiagaraSystem;

UCLASS( abstract )
class USimpleEvent : public USnapNetEvent
{
    GENERATED_BODY()

public:
    USimpleEvent();

    virtual void OnCanceled() override;

    virtual void OnConfirmed() override;

    virtual void OnPredicted() override;

    // The entity above which the FX should be played
    UPROPERTY()
    FSnapNetPropertyEntityIndex Entity;

protected:
    void SpawnFx();

    // Whether the FX have already been spawned for this event
    UPROPERTY( Transient )
    bool bFxSpawned;

    // The FX component spawned at runtime to play the FX system
    UPROPERTY( Transient )
    UNiagaraComponent* FxComponent;

    // The offset at which the FX should be played relative to the entity
    UPROPERTY( Category = "Simple Event", EditDefaultsOnly, BlueprintReadOnly )
    FVector FxOffset;

    // The FX system to play
    UPROPERTY( Category = "Simple Event", EditDefaultsOnly, BlueprintReadOnly )
    UNiagaraSystem* FxSystem;
};
#include "SimpleEvent.h"

#include "NiagaraComponent.h"
#include "NiagaraFunctionLibrary.h"
#include "SnapNetEntityRendererComponent.h"
#include "SnapNetSubsystem.h"

USimpleEvent::USimpleEvent()
    : FxOffset( 0.0f, 0.0f, 100.0f )
{
}

void USimpleEvent::OnCanceled()
{
    if ( FxComponent )
    {
        FxComponent->DestroyComponent();
        FxComponent = nullptr;
    }
}

void USimpleEvent::OnConfirmed()
{
    SpawnFx();
}

void USimpleEvent::OnPredicted()
{
    SpawnFx();
}

void USimpleEvent::SpawnFx()
{
    if ( bFxSpawned )
    {
        return;
    }

    bFxSpawned = true;

    if ( FxSystem != nullptr && Entity.GetValue() >= 0 )
    {
        if ( const USnapNetSubsystem* SnapNetSubsystem = USnapNetSubsystem::Get( this ) )
        {
            if ( const AActor* RendererActor = SnapNetSubsystem->GetEntityRenderer( Entity.GetValue() ) )
            {
                FxComponent = UNiagaraFunctionLibrary::SpawnSystemAttached( FxSystem, RendererActor->GetRootComponent(), NAME_None, FxOffset, FRotator::ZeroRotator, EAttachLocation::KeepRelativeOffset, true );
            }
        }
    }
}
Spawn the event
Now, we modify our SimplePlayerEntity to spawn a new event on click. Since there is already an input action named SetDestination defined as the left mouse click, we’ll use that as a condition to trigger the event. Changes to the existing SimplePlayerEntity code are highlighted below:
|
|
|
|
With those changes made, compile and run the editor.
Synchronize input action
First, as mentioned above, we’ll be using the SetDestination input action that’s already defined to detect when players click the left mouse button. In order to make this input action available for use within your network simulation, you must add it to your project’s SnapNet settings. To do so, navigate to Edit → Project Settings → Plugins → SnapNet and expand the Common → Input section. Under Input Actions, click on the + sign and enter SetDestination.
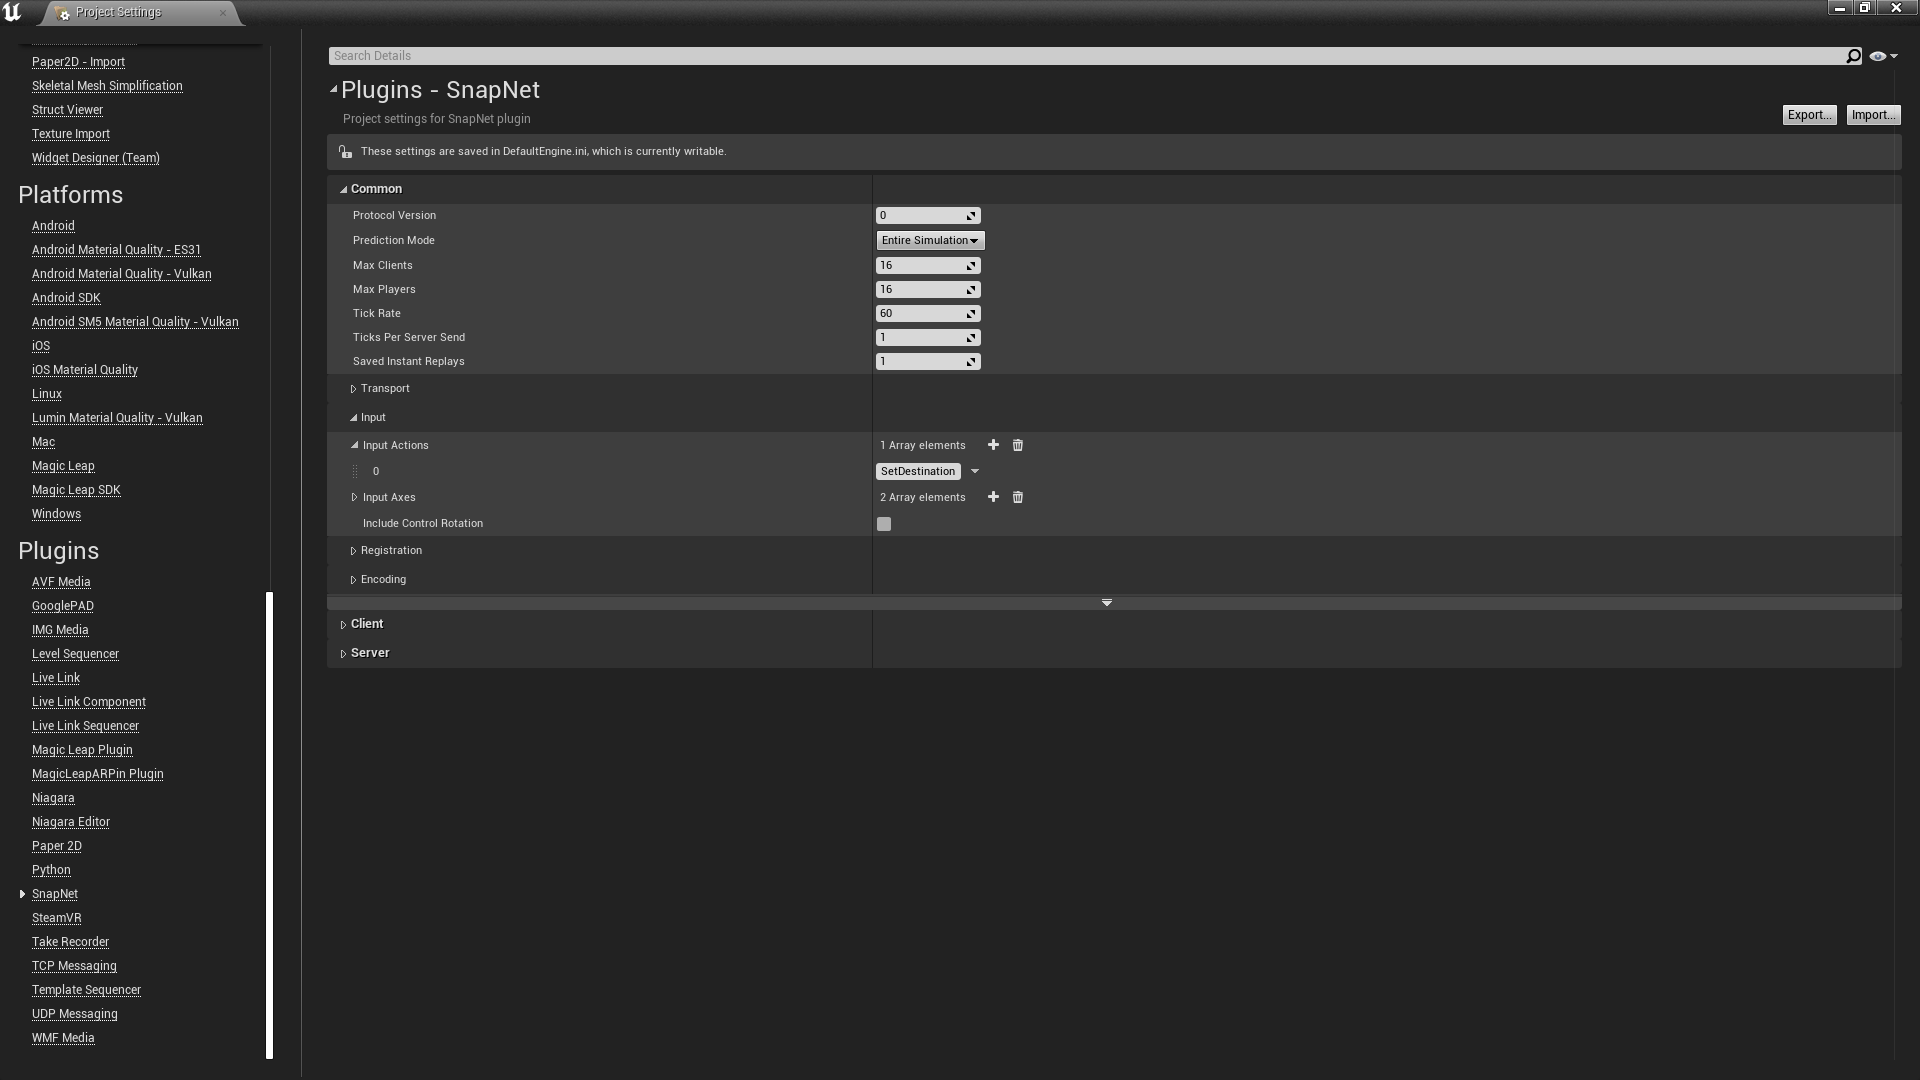
Note that this SetDestination label matches the one defined in Project Settings → Engine → Input.
Create the event blueprint
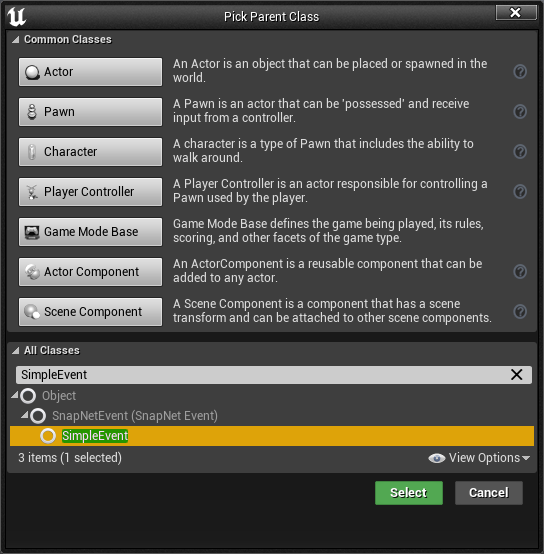
The next step is to create a blueprint for the event. Open the editor and use the Content Browser to create a new folder named Events. With this folder open, click Add/Import → Blueprint Class and select SimpleEvent as the parent class for the new blueprint.
Name it BP_SimpleEvent. Now double-click on this new blueprint to open it up and, in the Details panel, assign the Fx System property to RadialBurst. If you don’t see RadialBurst in the dropdown, click View Options in the bottom-right of the dropdown and ensure that Show Engine Content and Show Plugin Content are both selected.
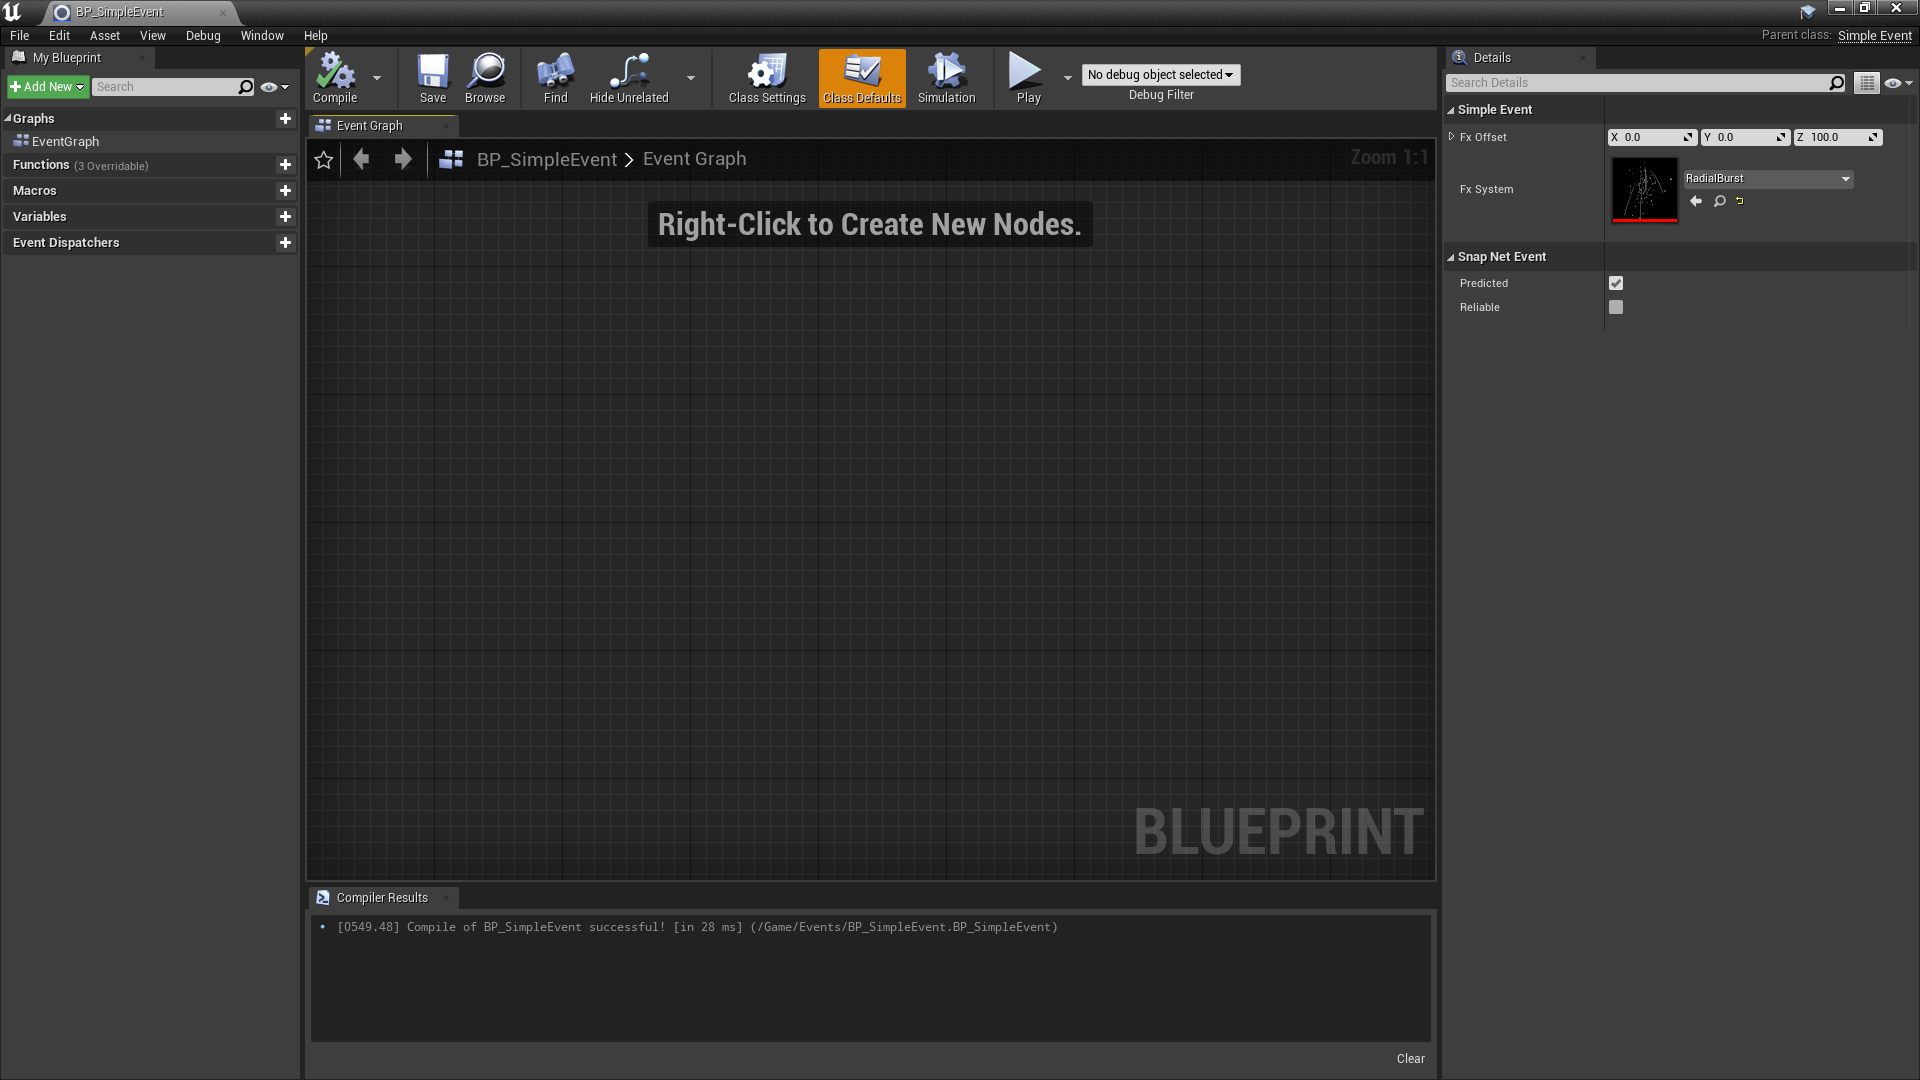
Compile and save the blueprint.
Link the entity and event blueprints
Now we need to tell our player entity which event class to spawn when we click. In the Content Browser, navigate to the Entities folder and double-click on BP_SimplePlayerEntity to open it. In the Class Defaults, assign Simple Event Class to the BP_SimpleEvent class you just created.
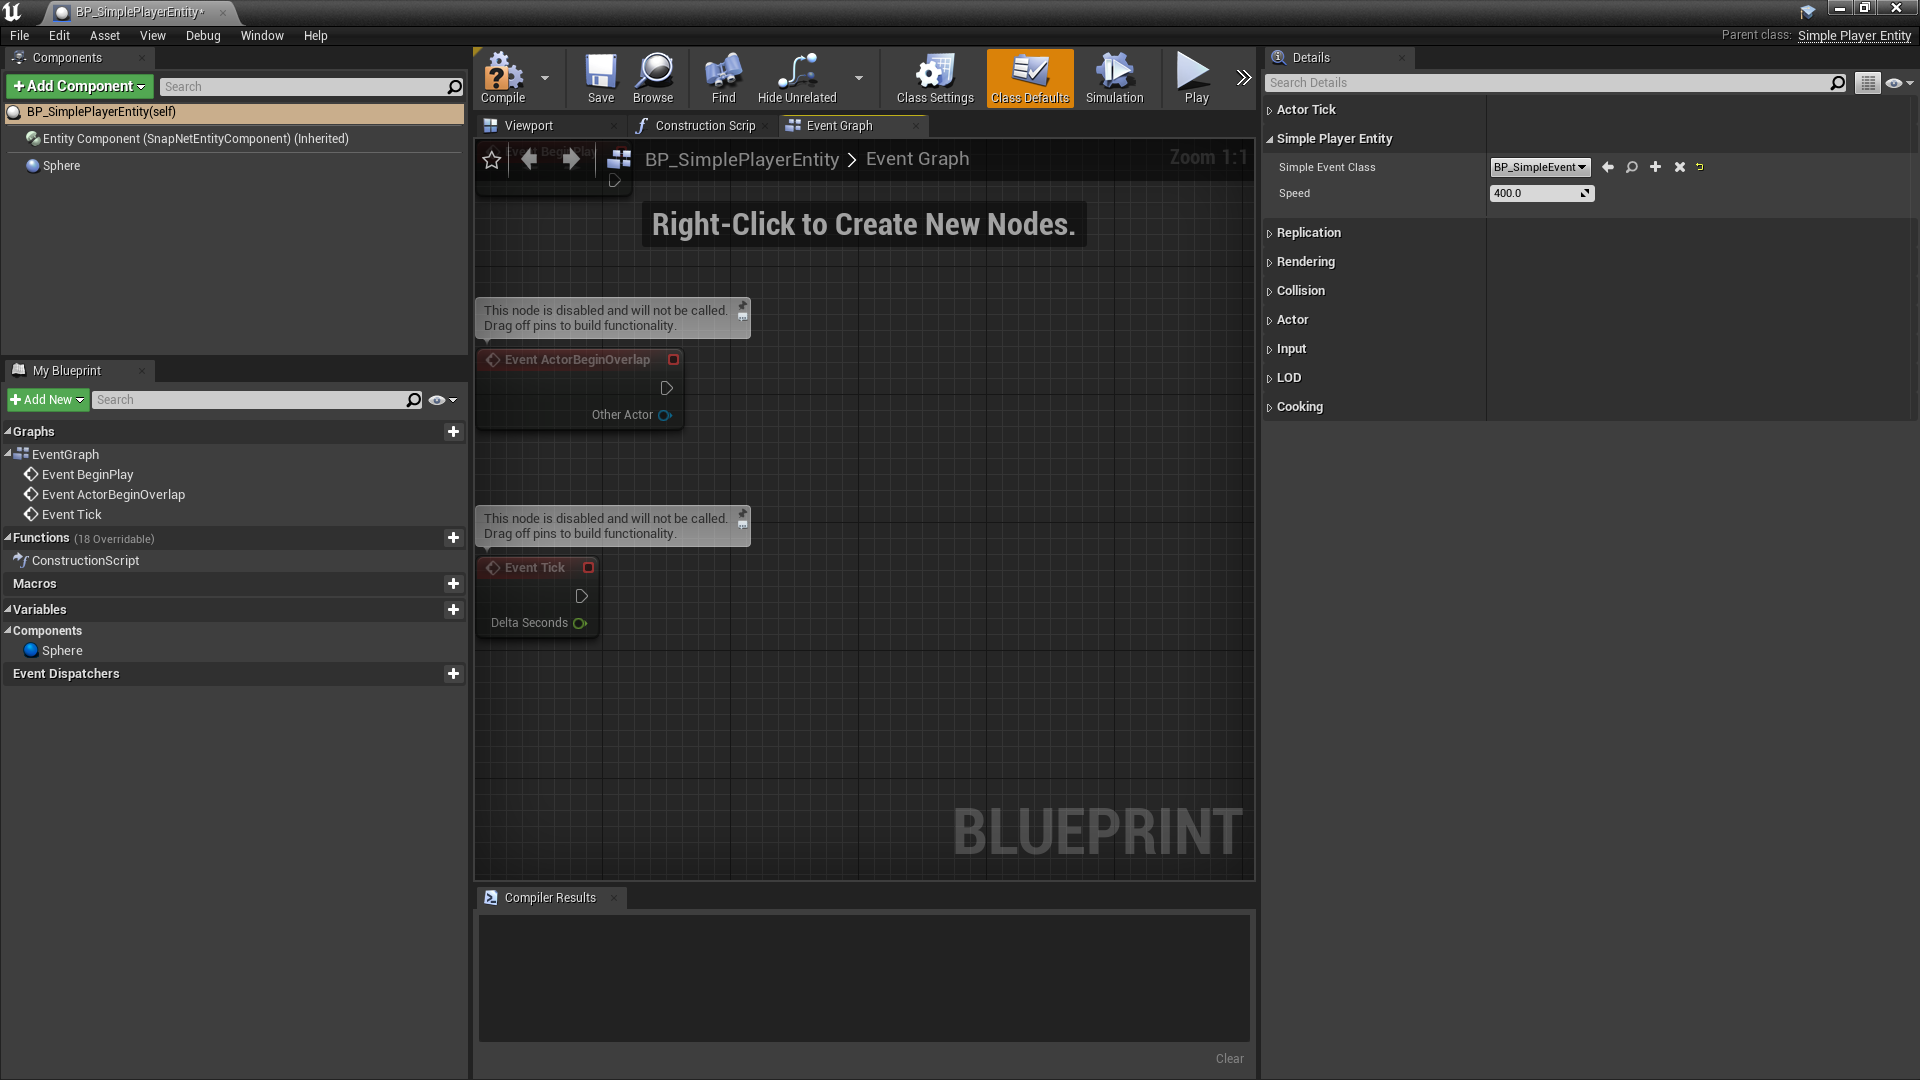
Compile and save the blueprint.
Register the event with SnapNet
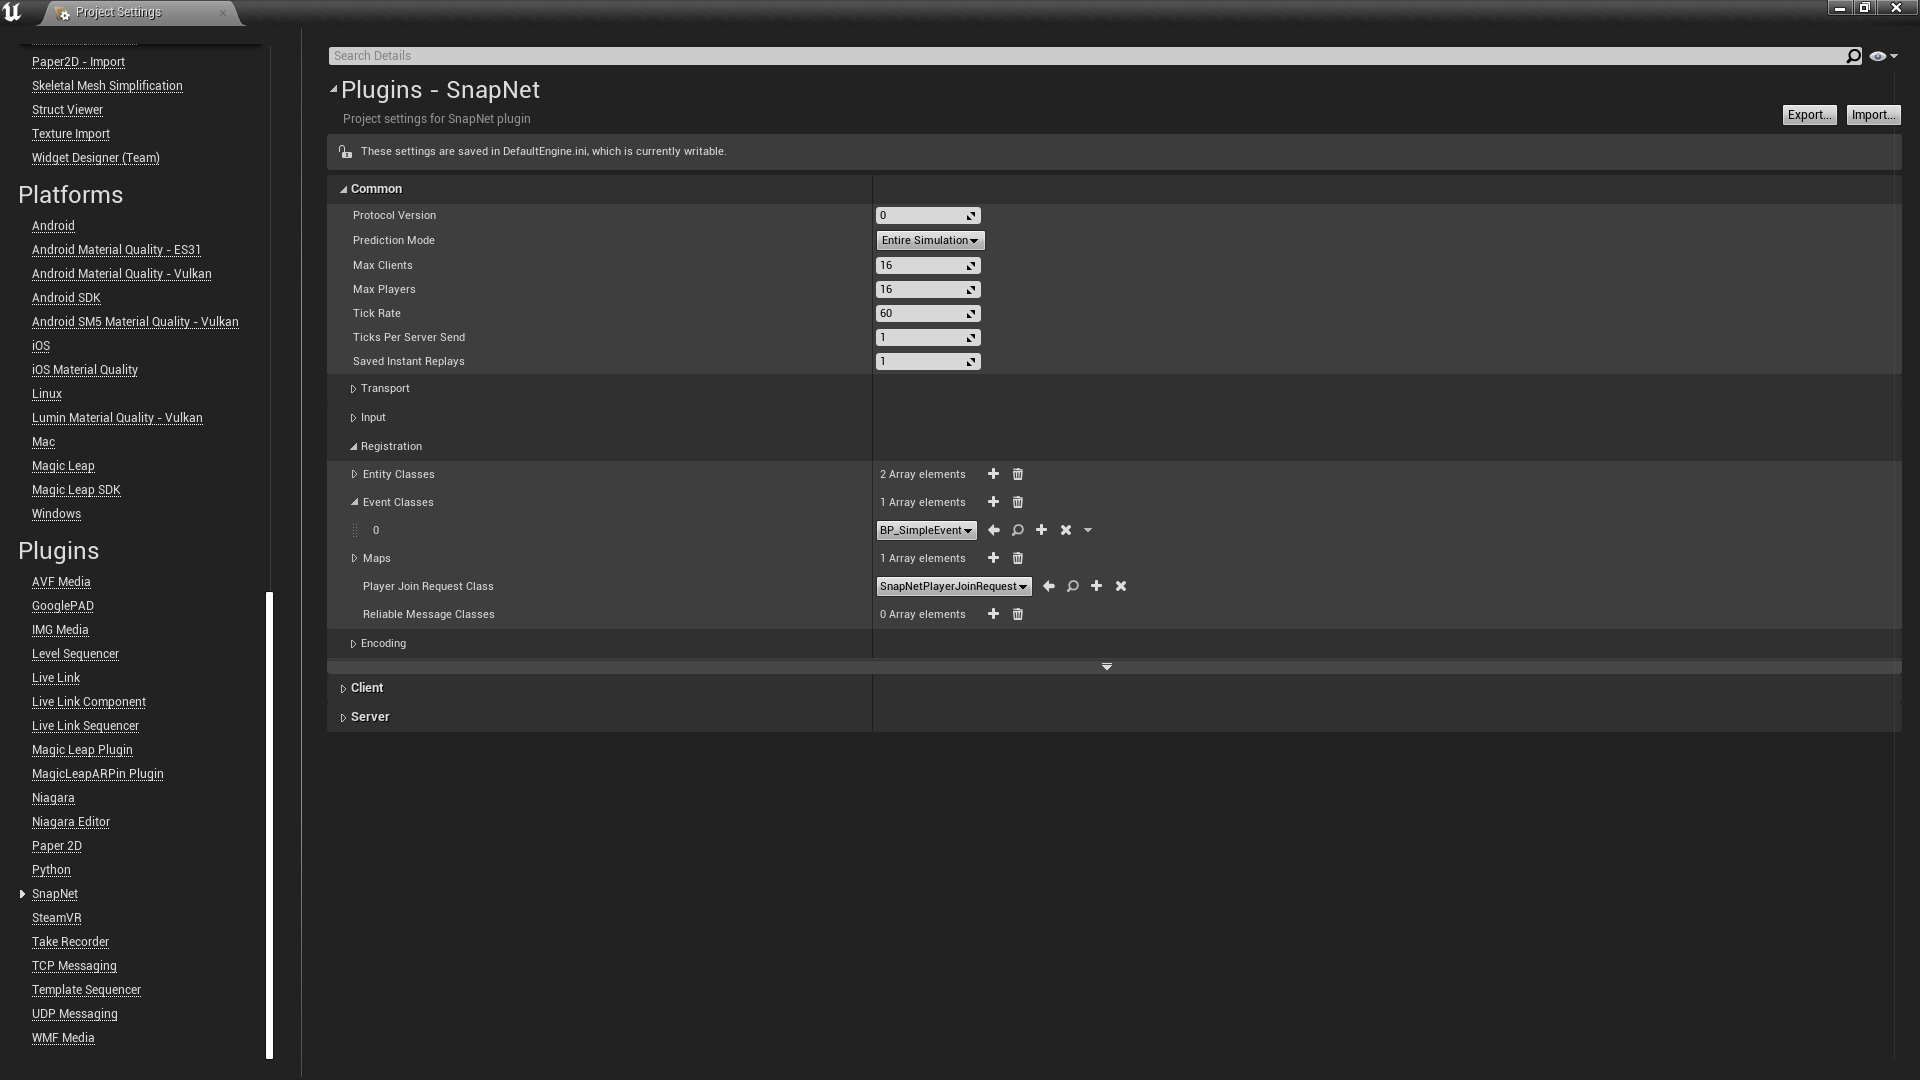
Like entities, any events that you want to spawn during a SnapNet session must be registered with the SnapNet Subsystem prior to session start. We’ll do this in the project’s SnapNet settings. Go to Edit → Project Settings → SnapNet → Common → Registration → Events. Click on the + sign to add an entry to the list and then, in the dropdown, select BP_SimpleEvent.
Play
Press Play in the toolbar and click your left mouse button while the viewport is active. You should see the Niagara FX play above the sphere you’re controlling.
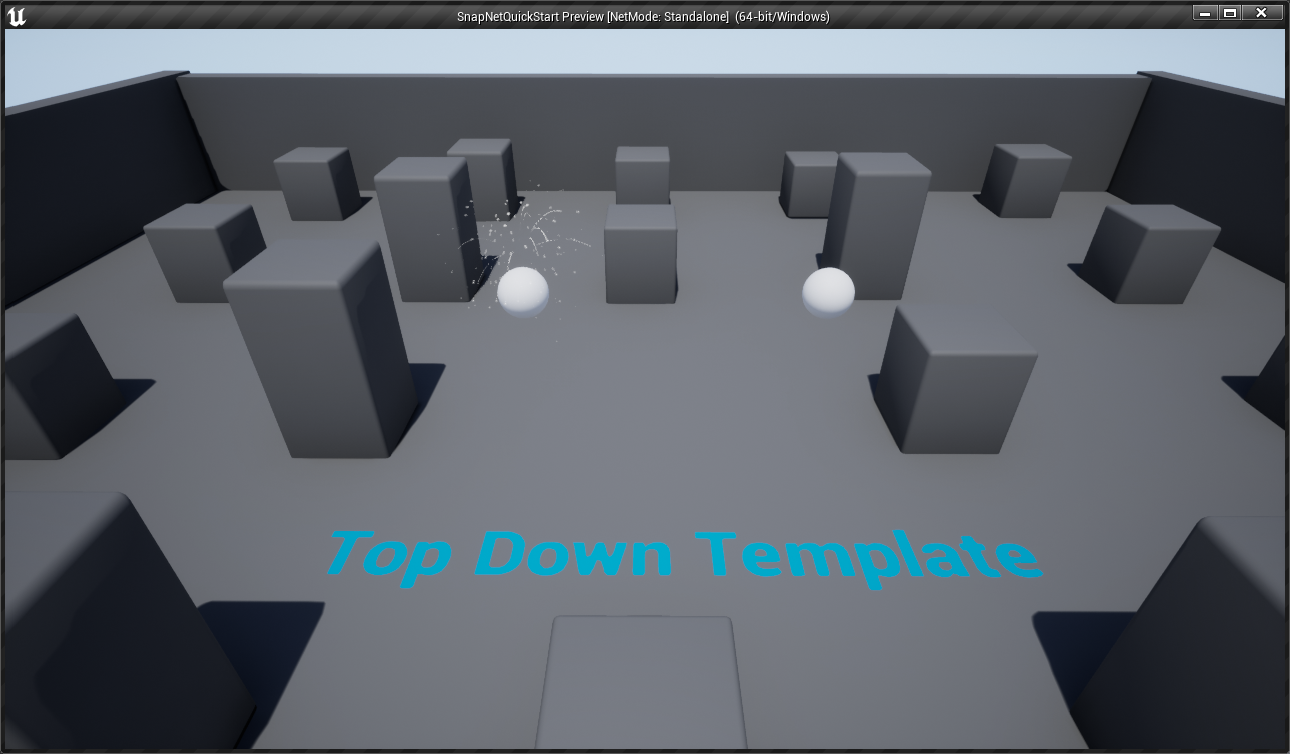
And that’s it! You now have fully-functional networked effects powered by SnapNet.
Next steps
Check out other Guides to learn more about what SnapNet can do.